Blog
The Complete Guide To Choose Your Above-Ground Swimming Pool Ground Mat
A swimming pool ground mat is the single most overlooked component of a new above-ground pool setup — and the one most likely to save you hundreds of dollars in liner repairs within the very first summer.
You’ve just unboxed your new above-ground pool. The sun is out, the kids are waiting, and you’re focused on getting water in that thing as fast as possible. It’s a completely understandable impulse — but the 45 minutes you spend on ground preparation before the liner ever touches the earth will determine whether your pool lasts one season or ten.
In this guide, we break down exactly what a swimming pool ground mat is, why it’s not optional, how to compare your protection options, and how to install one correctly so you never have to think about it again.
What Is a Swimming Pool Ground Mat?
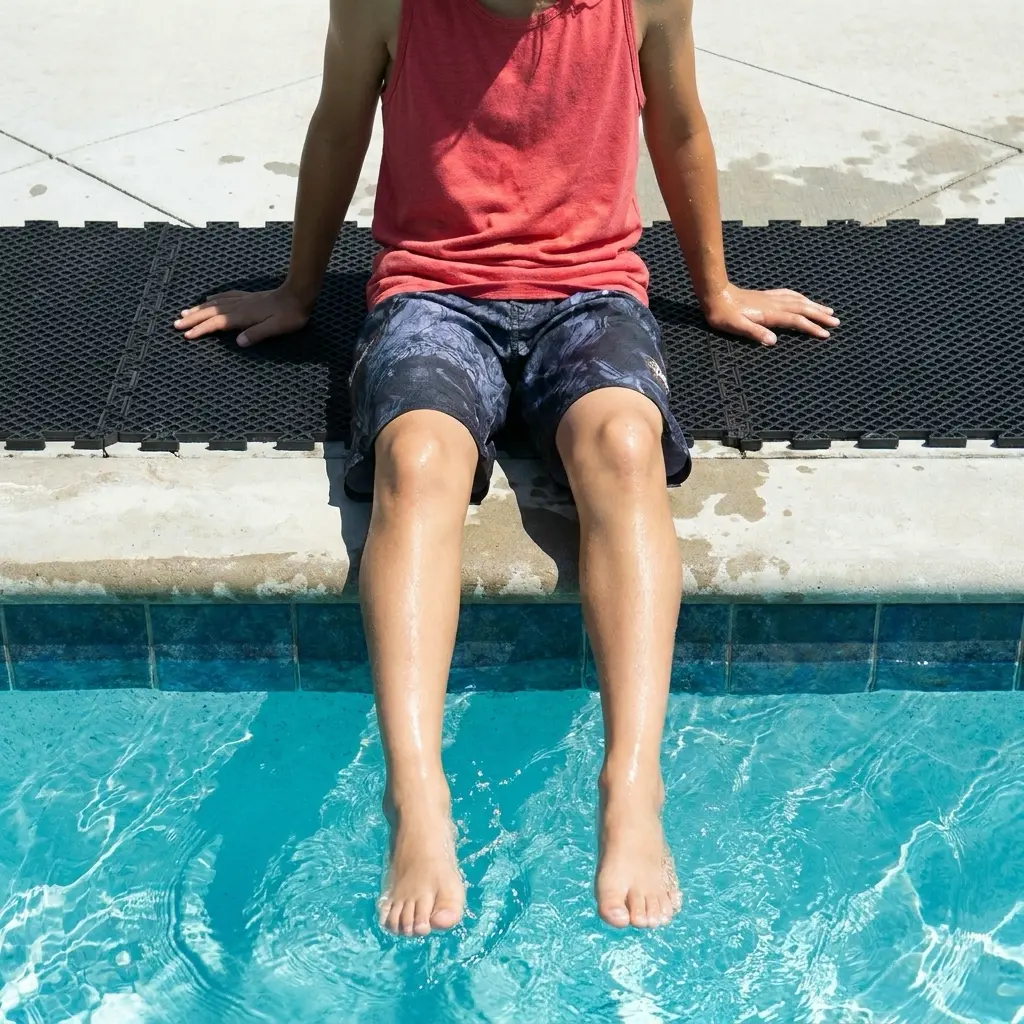
A swimming pool ground mat — also called a pool pad, pool floor cushion, or pool underlayment — is a protective layer placed between the bare ground and the inside floor of your above-ground pool liner. Its job is deceptively simple: create a clean, smooth, soft, stable surface that the liner can rest on without risk of damage.
Pool ground mats come in several materials and formats, from purpose-built foam pads to extruded polystyrene (XPS) foam boards to compacted sand. Each has a distinct installation profile, cost point, and performance characteristic we’ll break down in full below.
The confusion between a “ground cloth” (placed under the pool frame to protect grass) and a “ground mat” (placed inside the pool under the liner) trips up a lot of first-time pool owners. Both are useful — but they serve completely different purposes, and one does not substitute for the other.
Why You Need One: The Hidden Threats Beneath Your Pool
Before you fill that pool, understand what’s actually underneath it. Even a freshly raked, seemingly clean patch of grass hides a surprisingly hostile environment for a vinyl liner.
1. Rock and Root Punctures
The weight of a filled above-ground pool is extraordinary. A modest 15-foot round pool holding 5,000 gallons exerts roughly 40,000 lbs of downward force on the ground beneath it. That constant pressure drives the liner down onto every pebble, root fragment, and soil irregularity beneath it. What starts as a barely noticeable bump under a freshly installed liner becomes a stress point — and eventually a pinhole leak — over the course of a single summer.
2. Ground Shifting and Liner Stress
Bare earth expands when wet and contracts when dry. Over the course of a season, these micro-movements pull and bunch the liner, creating folds and creases. Creases weaken vinyl by creating stress concentration zones — the same way folding a piece of plastic film repeatedly eventually causes it to crack. A swimming pool ground mat decouples the liner from these ground movements entirely.
3. Thermal Loss
Ground temperature sits significantly lower than the water in your pool, especially in the early and late season. Direct contact between your liner and cold earth draws heat out of the water continuously — raising your heating costs if you use a heater, or simply robbing you of comfortable water temperatures if you don’t. A foam-based swimming pool ground mat acts as thermal insulation, reducing this heat transfer substantially.
4. Foot Comfort
This one is underappreciated until you experience it. Standing on a bare-earth or gravel-contact pool floor for an extended time is genuinely uncomfortable. A proper foam ground mat creates a soft, even surface that makes the pool floor feel more like a padded gym floor than a gravel driveway — a meaningful quality-of-life upgrade, especially for young children who spend more time on the pool floor than adults do.
5. Leveling Insurance
Vinyl liners require a nearly perfectly level surface to hang correctly. Even a 1–2 inch variance across the pool diameter causes water to press unevenly against the walls, straining the liner’s seams and potentially causing the pool structure itself to lean and buckle. A ground mat — particularly one installed over a smoothed, compacted base — bridges minor imperfections in the ground and provides a final leveling layer that catches what raking alone misses.
Foam Boards vs. Dedicated Pool Pads vs. Sand: Full Comparison
There are three mainstream options for your swimming pool ground mat layer, each with a distinct installation profile. Here’s the honest breakdown:
Extruded polystyrene (XPS) foam insulation boards — the same pink or blue rigid foam used in home construction — cut to size and laid as a continuous floor layer inside the pool frame.
Purpose-built geotextile or foam-composite pads designed specifically for above-ground pool liner protection. Brands like Gorilla Floor Padding are the most widely used.
A 2–3 inch layer of mason’s sand (not play sand or coarse builder’s sand) spread, leveled, and compacted inside the pool footprint.
Side-by-Side Comparison Table
| Factor | XPS Foam Board | Dedicated Pool Pad | Sand Base |
|---|---|---|---|
| Puncture Protection | ✓ Excellent | ✓ Excellent | ✗ None |
| Thermal Insulation | ✓ R-5/inch | Minimal | ✗ None |
| Foot Comfort | ✓ Firm/smooth | ✓ Soft | ✗ Rough |
| Leveling Ability | Moderate | Moderate | ✓ Best |
| Installation Ease | Medium (seam taping) | ✓ Easiest | Hard (requires screeding) |
| Cost (15ft round) | ~$40–$80 | ~$60–$120 | ~$20–$40 + labor |
| Moisture Resistance | ✓ Excellent | Good | ✗ Can erode |
| Lifespan | 5–10 years | 3–7 years | Indefinite (maintenance required) |
Step-by-Step Installation Guide
A properly installed swimming pool ground mat starts with the ground itself, not the mat. Here is the complete process, in order of operations.
Mark and Clear the Pool Footprint
Use a tape measure and marking spray paint or flour to outline the pool’s exact footprint on the ground, adding 6 inches on all sides. Remove all grass, vegetation, and organic debris within this zone using a flat spade or sod cutter. Do not skip this step — decomposing organic matter under a pool creates soft spots, gas pockets, and insect activity that will compromise your liner over time.
Use a metal rake to surface-clear the area. Follow up on hands and knees and physically remove any rocks, root fragments, or debris larger than a pea. Run your palm across the ground — if you can feel it, your liner will too once 40,000 lbs is sitting on it.
Level the Ground — This Step Cannot Be Rushed
Leveling is the most critical phase of pool installation. Use a 6-foot or longer carpenter’s level (or a water level for large pools) to check the ground in multiple directions — N/S, E/W, and both diagonals. Your tolerance is no more than 1 inch of variance across the entire pool diameter. For a 15-foot pool, that means 1 inch over 180 inches of run.
Work by removing high spots, never by filling low ones with loose soil. Loose fill compresses unevenly under water weight and will cause your pool to lean. Use the back of a metal tamper or a hand compactor to pack any disturbed earth firmly.
- Check level after every 6 inches of material removed
- Work from the center outward
- Re-check after tamping — compaction always changes the surface height
Lay the Frame and Bottom Rails First
Before placing your ground mat, set up the pool’s bottom rails and frame structure. This defines the exact interior perimeter and gives you a precise template to cut your ground mat to. Attempting to install the mat first and then build the frame over it typically results in misaligned boards and gaps at the perimeter — where protection matters most.
Cut and Lay XPS Foam Boards (Technical Detail)
For XPS foam board installation, start from the center of the pool and work outward in a radial pattern. Cut boards using a utility knife and straight edge — score the face deeply and snap cleanly. For round pools, cut the perimeter boards at an angle to follow the pool wall curve rather than leaving square cuts that create gaps.
Critical: Tape every seam. Use 3M 8067 foil tape, Tyvek house wrap tape, or any wide-body (3"+) pressure-sensitive tape rated for below-grade moisture. Here is the correct seaming sequence:
🔬 Technical Detail: How to Tape Foam Board Seams So They Don’t Shift Under Water Pressure
- Butt seams tightly. There should be zero gap between boards before you tape. Even a 1/8″ gap will allow the boards to pivot under load and create a ridge that the liner contacts.
- Clean the surface. Wipe the top face of each board along the seam line with a dry cloth before taping. Foam dust and debris prevent tape adhesion. In humid conditions, give it a quick pass with a heat gun or hair dryer.
- Apply tape with overlap. Run tape centered over the seam with equal coverage on each board face — minimum 1.5 inches per side. Press firmly from center outward to eliminate air bubbles beneath the tape.
- Tape all perimeter edges. Where boards meet the pool wall, fold the tape up approximately 1 inch onto the wall face of the board. This prevents the board edge from lifting as the liner is draped and filled.
- Double-tape any T-intersections or cross joints. These are the highest-stress points in the panel layout. Apply a second layer of tape oriented perpendicular to the first.
- Test before lining. Once fully taped, walk across the entire board surface slowly. You should feel zero movement or flex between adjacent boards. Any board that shifts or rocks needs an additional tape run on the underside edge.
Optionally Layer a Dedicated Pool Pad on Top
If using a dedicated pool pad (like Gorilla Floor Padding) in addition to foam boards, center it over the foam layer and smooth it outward from the middle, working any wrinkles toward the edges. Trim excess at the pool wall with scissors — the pad should sit flat against the pool’s cove (the foam or sand curve at the base of the wall). Do not let the pad curl up the wall, as this can create a bump under the liner.
Install the Cove
The “cove” is the curved transition between the floor and the wall — the most stress-prone area of the liner. Use either pre-formed foam cove pieces (sold in kit form) or pack a smooth, rounded bead of sand or foam against the base of the pool wall all the way around the interior perimeter. A proper cove prevents the liner from being bent at a 90-degree angle, which is the leading cause of liner tears at the wall-to-floor seam.
Install the Liner and Begin Filling
Drape the liner over the pool wall and smooth it across the ground mat, working from the center outward. On a warm day (above 70°F), the liner is more pliable and will conform more easily. Begin filling with 2–3 inches of water, then smooth out any remaining wrinkles or folds before continuing. Once more than 6 inches of water is in the pool, the liner is locked in place and wrinkles become permanent.
Expert Tips: Pavers, Lumber & Why Tarps Almost Always Fail
Use Pavers or Pressure-Treated Lumber Under Frame Legs
Above-ground pool legs concentrate an enormous amount of weight on a small footprint. Place a solid concrete paver (at least 12×12 inches) or a pressure-treated 2×6 lumber block under each leg before assembly. This distributes the load, prevents the legs from sinking into soft soil over the season, and keeps the frame level even as the ground shifts slightly through seasonal freeze/thaw cycles.
Slope the Perimeter Away from the Pool
After installing the frame, check that the ground slopes very gently away from the pool in all directions — about 1 inch per 4 feet. This prevents rainwater and splash-out from pooling around the base of the pool structure, which accelerates rust on steel frames and can undermine the ground beneath the mat over time. If your site is flat, build up a gentle berm of compacted soil around the perimeter.
Why Standard Blue Tarps Fail (Every Time)
Blue polyethylene tarps are cheap, widely available, and almost universally recommended by people who have never had to replace an above-ground pool liner. The problem: tarps are smooth, non-cushioning, and trap moisture directly against the liner. They also wrinkle under load, creating pressure ridges that dig into the liner. UV degradation causes them to fragment into sharp plastic shards within 2–3 seasons — the exact opposite of protection. They are a short-term solution that creates long-term liner damage.
Treat the Ground Around the Pool for Weed Growth
Grass and weeds will aggressively re-colonize the moist, sheltered space beneath your pool. Apply a pre-emergent herbicide to the cleared ground before laying your mat, or lay landscape fabric beneath the foam board layer. Roots that find their way under your pool mat will eventually create the same puncture risk you worked to eliminate. See our guide on weed control for lawns for the right product for this application.
Consider Foam Cove Kits Over Sand Coves
Pre-formed foam cove kits are sold in sections sized to the pool diameter and snap together in minutes. They are more consistent in shape than a hand-packed sand cove and don’t erode or shift. They also provide the same foam padding benefit at the wall-to-floor junction — the highest-risk zone for liner stress. The upfront cost is $30–$60 but they are a professional-grade upgrade worth every dollar.
Winterization: Protect the Mat Between Seasons
When winterizing your pool, do not remove the foam board layer. Leave it in place under the drained liner — it insulates the ground from freeze penetration, which helps maintain a more stable base surface for re-opening the following spring. Lay a pool cover and air pillow as normal. The foam will be in perfect condition when you re-open and does not need to be replaced annually.
Frequently Asked Questions
It depends on the material. XPS foam boards are rated for 25+ years in building applications and will typically outlast the pool itself when properly installed and kept dry. Dedicated foam pool pads (like Gorilla Floor Padding) last 3–7 seasons before the foam compression becomes noticeable. Geotextile-type pool pads can last longer — 7–10 years — but their puncture resistance diminishes after the first few seasons as the fibers compress.
The key longevity factor is moisture management. Any ground mat that sits in standing water between the mat and the ground will degrade significantly faster. This is why foam board outperforms fabric pads in longevity — XPS foam is closed-cell and genuinely waterproof, not just water-resistant.
Some moisture accumulation under the pool mat is normal and unavoidable — especially in regions with high water tables or clay-heavy soils. The question is whether that moisture causes problems. For XPS foam board, the answer is largely no — it is a closed-cell material that does not absorb water, does not rot, and does not support mold growth. You can pull it up after years in service and it will be in nearly the same condition as installed.
For fabric-type pool pads, trapped moisture can support mildew and bacterial growth in the fabric itself over multiple seasons. This doesn’t damage the mat’s protective function immediately, but it can create odor issues when the pool is opened and the mat is disturbed.
Practical advice: Install your pool on ground that drains reasonably well. If your site has drainage problems, address them with a French drain or by grading before installation. You can also lay a sheet of 6-mil poly vapor barrier on the ground before the foam boards to minimize ground moisture migration upward.
Sand alone does not provide adequate puncture protection from below. Sand fills in around rocks and roots rather than creating a uniform barrier above them. Over time, settlement and worm activity create pathways through the sand layer, allowing sharp objects to migrate toward the liner.
If you use a sand base (which is excellent for leveling purposes), we strongly recommend placing a dedicated pool pad or at least a layer of XPS foam board on top of the compacted sand before installing the liner. Think of sand as the leveling sub-base and the foam/pad as the actual protective layer — both serve distinct purposes and work best together.
This is one of the most common improvised solutions — and one of the most consistently problematic. Carpet padding and rugs absorb and retain moisture, creating a persistently damp environment directly against the pool liner. This accelerates algae growth in the water, promotes bacterial activity in the material, and creates an ideal habitat for burrowing insects. Old carpet backing also degrades into sharp fiber fragments over time.
We understand the appeal of a zero-cost solution, but the cost of replacing a liner prematurely ($400–$600) makes even the most premium dedicated swimming pool ground mat look like an outstanding value by comparison. Invest in the right material once and don’t think about it again.
The first sign is usually a subtle ridge or bump you can feel through the liner with your feet. In severe cases, you may notice a visible lump or depression in the pool floor when looking across the water surface at an angle. If you suspect shifting, do not wait — drain the pool partially until the liner is accessible and re-smooth the mat before refilling. Leaving a displaced mat seam in contact with the liner under full water pressure for an extended period will eventually cause a tear at that stress point.
Proper seam taping (as detailed in our XPS installation section) is the best prevention. A fully taped foam board installation should not shift at all under normal conditions.
No — and this distinction is important. A pool ground cloth (sometimes called an under-pool tarp or ground cover) is placed outside the pool frame, directly on the ground beneath the frame’s footprint. Its job is to protect the lawn beneath the pool and prevent grass and weeds from growing up under the pool structure. It does nothing to protect the liner.
A swimming pool ground mat is installed inside the pool frame, between the ground and the liner. It is what actually protects the liner from punctures, provides insulation, and creates a comfortable floor surface. You want both — but they are not interchangeable, and having only the ground cloth while skipping the interior mat is the most common setup mistake new pool owners make.
Final Verdict: Set It, Forget It, Swim More
The right swimming pool ground mat is genuinely a set-it-and-forget-it investment. Spend an afternoon on proper ground prep and foam board installation, tape your seams correctly, and you will likely never think about your pool floor again — because there will be nothing to think about. No leaks, no lumps, no liner stress, and no unexpected $500 replacements at the start of summer.
Here’s the short version of everything we covered:
- A swimming pool ground mat sits inside the pool, between the ground and the liner — not outside under the frame
- XPS foam board is the best DIY option: inexpensive, waterproof, insulating, and durable
- Tape every seam with 3″+ pressure-sensitive tape and double-tape all intersections
- Sand is a leveling sub-base, not a liner protection layer — use both in combination for the best results
- Standard blue tarps are not an acceptable substitute — they fail within 1–2 seasons and can accelerate liner damage
- Pavers or pressure-treated lumber under frame legs prevent settling and keep your pool structurally level throughout the season
- A properly installed foam board layer outlasts most pool liners — you install it once
The pool itself is the exciting part. The ground mat is the unglamorous part. But every experienced pool owner will tell you the same thing: the 60 minutes you invest in the ground before the liner ever goes in are the 60 most important minutes of the entire pool setup process.
Ready to Set Up Your Pool the Right Way?
Get the professional-grade tools and DIY installation supplies — foam boards, seam tape, leveling equipment, and pool accessories — to ensure a smooth, long-lasting setup from day one.
Browse Lawn & Garden Supplies →