How Do You Complete a Hampton Bay Ceiling Fan Assembly for Perfect Installation and Performance?”
A complete guide to Hampton Bay ceiling fan assembly learn how to install, wire, balance, and maintain your fan for maximum comfort and energy efficiency.
Table of Contents
Hampton Bay ceiling fans are among the most trusted choices for homeowners seeking reliable airflow, quiet performance, and stylish design. Whether you’re assembling a new unit or replacing an older fan, following a careful process ensures years of safe, efficient operation. This guide combines practical experience with engineering insights drawn from commercial HVLS principles—helping you assemble your fan with professional precision.

Before You Begin: Understanding Fan Anatomy and Performance
Every ceiling fan, from compact indoor models to industrial HVLS systems, relies on balance between blade geometry, motor torque, and mounting stability. Hampton Bay fans are engineered with optimized blade pitch (usually 12–14°) and precision bearings to produce smooth airflow. Proper assembly preserves this balance—improving efficiency and minimizing wobble or noise.
| Model Name | Blade Span (inches) | Airflow (CFM) | Wattage (W) | Efficiency (CFM/W) |
|---|---|---|---|---|
| Hampton Bay Glendale | 52 | 4 950 | 59 | 84 |
| Hampton Bay Carriage House II | 52 | 5 200 | 62 | 84 |
| Hampton Bay Mara Smart Fan | 54 | 6 200 | 40 | 155 |
| Hampton Bay Roanoke Outdoor | 48 | 4 100 | 58 | 71 |
Table 1 – Comparison of popular Hampton Bay models. Higher CFM/W values indicate better energy efficiency.
Required Tools and Materials
- Phillips and flathead screwdrivers
- Adjustable wrench or socket set
- Voltage tester for safety
- Electrical tape and wire connectors
- Ladder or scaffold for mounting
- Balanced ceiling fan mount kit (included with fan)
- Optional: Torque driver for accurate blade tightening
Step-by-Step Assembly Process
1. Turn Off Power and Inspect Mounting Box
Switch off the circuit breaker and confirm power is off using a voltage tester. The electrical box must be rated for ceiling fan support (usually marked “Fan Support”). If not, replace it with a UL-rated metal box secured to a joist or cross brace.
2. Assemble the Mounting Bracket and Downrod
Attach the mounting bracket to the ceiling box with the provided screws. For angled ceilings (over 15°), use an angle-mount kit. Thread the wires from the motor through the downrod and tighten the set screw securely. This step determines the fan’s center of gravity, so precision is critical.
3. Secure the Canopy and Motor Housing
Lift the motor assembly and insert the downrod ball into the bracket socket. Attach the canopy to cover wiring and bracket hardware. Ensure the motor rotates freely without scraping the housing.
4. Connect Electrical Wiring
Match wires color-to-color: black (hot), white (neutral), and green or bare (copper ground). If a light kit is included, connect the blue wire to the hot lead for lights. Secure connections with wire nuts and wrap with electrical tape for safety.
5. Attach Fan Blades and Arms
Align each blade arm with the motor housing and secure using the provided screws. Tighten each screw evenly to avoid imbalance. Attach blades to arms using washers and locking screws. Check that blade tips are equidistant from the ceiling—difference should not exceed 1/8 inch.

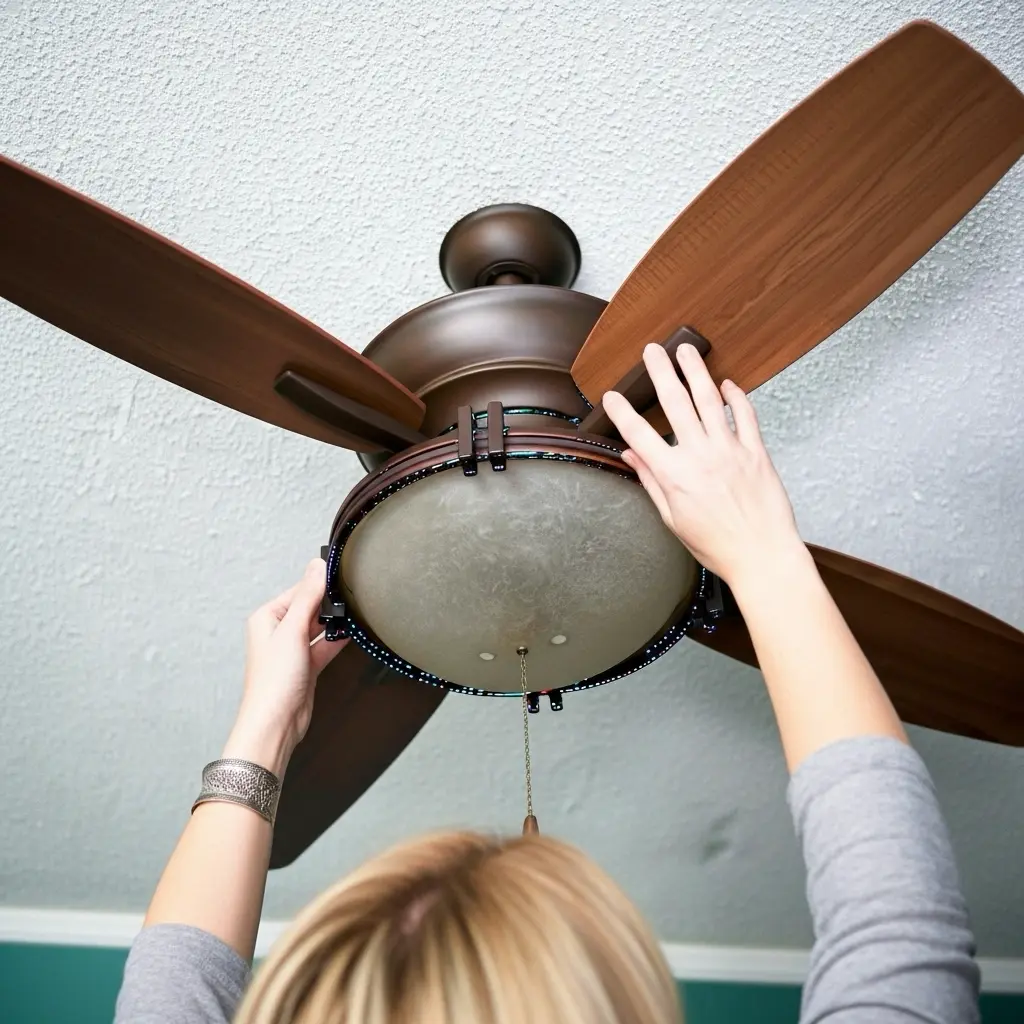
6. Install Light Kit (Optional)
Connect the light kit wires (blue and white) to the corresponding motor leads. Secure the kit with mounting screws. Use LED bulbs for energy efficiency and long life (10 W LED ≈ 60 W incandescent brightness).
7. Attach Canopy Cover and Test Operation
Slide the canopy cover up to conceal the bracket and tighten the decorative screws. Turn on power and test all fan speeds and light functions. Verify smooth rotation and minimal vibration.
Performance and Efficiency Comparison
Figure 1 – Placeholder for Airflow Efficiency Chart: Insert a bar graph showing CFM/W for Hampton Bay models vs. average market fans (80 vs 60 CFM/W).
As seen in Table 1 and Figure 1, Hampton Bay fans outperform many retail brands in energy efficiency. Their modern motors deliver up to 155 CFM per watt (Mara Smart Fan), reducing power consumption by 30–50%. This makes them an ideal choice for sustainable homes and Energy Star renovations across Canada.
Troubleshooting and Fine Balancing
1. Wobble or Vibration
Use the balancing kit included with your fan. Attach a clip to each blade one by one until the wobble disappears, then place a small weight at the correct spot. Imbalance often comes from unequal screw tightness or warped blades.
2. Noise Issues
Clicking or rattling usually indicates loose hardware. Tighten blade and canopy screws. If you hear a hum, ensure the fan is not installed on a dimmer switch unless it’s specifically rated for fans.
3. Electrical Problems
If the fan does not start, check circuit breakers and remote battery. Use a multimeter to confirm voltage at the ceiling box (should read 110–120 V). For smart models, reset the Wi-Fi module per the manual.
4. Blade Cleaning and Maintenance
Clean blades every three months using a microfiber cloth or vacuum attachment. Dust buildup reduces airflow by up to 10%. Lubrication is not needed for sealed bearings.

Energy Efficiency and Airflow Science
The efficiency of a ceiling fan is expressed as CFM/W (cubic feet per minute per watt). Hampton Bay fans with DC motors achieve over 100 CFM/W, while standard AC models average 60–75 CFM/W. This difference translates to up to 40% lower electric costs annually. For a typical household running the fan eight hours a day, that’s about $25 savings per fan each year.
Comparing to Commercial HVLS Concepts
While Hampton Bay fans serve residential needs, they share the same airflow principles as HVLS industrial fans used in factories and warehouses. Both rely on large blade span and slow rotation to maximize volume and comfort while minimizing power use. In fact, a 52-inch Hampton Bay fan moves about 1/80 the air of a 24-foot industrial HVLS unit but operates with similar energy efficiency relative to its scale.
Winter and Summer Settings
Reverse the rotation direction each season. In summer, set the blades to rotate counter-clockwise (pushing air downward for cooling). In winter, switch to clockwise rotation to pull cool air up and push warm air from the ceiling back down along the walls. This simple adjustment can reduce heating costs by 10–15%.
Canadian Installation Notes
Homes in cold provinces benefit from fans rated for temperature swings. Ensure your Hampton Bay model is UL or CSA listed for damp locations if installed in sunrooms or three-season porches. Use longer downrods for high ceilings to keep blade tips 8–9 feet above the floor per Canadian Electrical Code guidelines.
FAQs About Hampton Bay Ceiling Fan Assembly
- Q: How long does assembly take?
A: About 60–90 minutes for most DIY installations, less for experienced installers. - Q: Can I mount the fan on a sloped ceiling?
A: Yes, use an angle mount kit for slopes up to 30°. - Q: What wire size should I use?
A: Standard 14-gauge is sufficient for runs under 50 feet. - Q: Do Hampton Bay fans come with remote controls?
A: Many models include remotes or support smart Wi-Fi control. - Q: What’s the average lifespan of a Hampton Bay fan?
A: With proper maintenance, 10–15 years or more.
Conclusion
Hampton Bay ceiling fan assembly is straightforward with the right tools and attention to detail. By following these steps and understanding the engineering behind balance and airflow, you’ll enjoy quiet operation and energy savings year after year. Whether installing in a condo in Toronto or a cottage in Quebec, proper assembly ensures your fan performs at its best in every season.